PVE更换国内源 备份源文件 1 cp /etc/apt/sources.list /etc/apt/sources.list.backup
添加国内源 脚本1
1
2
3
4
5
6
7
8
9
cat <<EOF > /etc/apt/sources.list deb http://mirrors.ustc.edu.cn/debian/ bookworm main non-free-firmware deb-src http://mirrors.ustc.edu.cn/debian/ bookworm main non-free-firmware deb https://mirrors.ustc.edu.cn/debian-security bookworm-security main contrib deb http://mirrors.ustc.edu.cn/debian/ bookworm-updates main non-free-firmware deb-src http://mirrors.ustc.edu.cn/debian/ bookworm-updates main non-free-firmware EOF
1 echo "deb https://mirrors.tuna.tsinghua.edu.cn/proxmox/debian bookworm pve-no-subscription" > /etc/apt/sources.list.d/pve-no-subscription.list
屏蔽企业源 1 sed -i 's/^deb https:\/\/enterprise.proxmox.com\/debian\/pve/#deb https:\/\/enterprise.proxmox.com\/debian\/pve/' /etc/apt/sources.list.d/pve-enterprise.list
屏蔽 Ceph 源 1 sed -i 's/^deb https:\/\/enterprise.proxmox.com\/debian\/ceph-quincy/#deb https:\/\/enterprise.proxmox.com\/debian\/ceph-quincy/' /etc/apt/sources.list.d/ceph.list
更新系统 1 apt update && apt dist-upgrade
PVE 硬盘操作 初始化磁盘
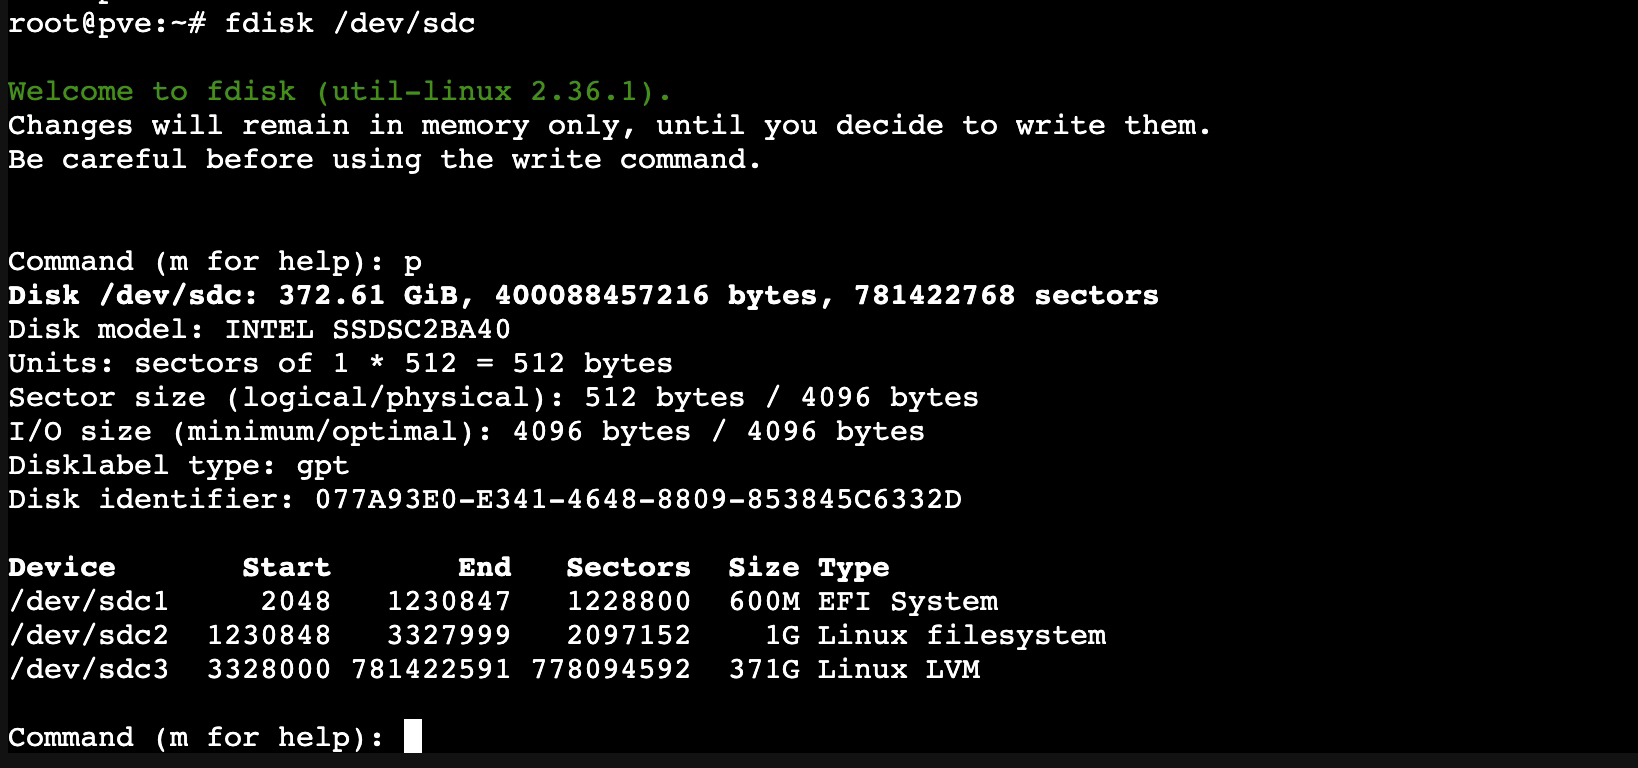
fdisk /dev/sdc
1
2
3
4
5
进入fdisk 输入 p 查看磁盘分区 输入 d 删除分区 输入 w 保存 在命令行中查看磁盘 S.M.A.R.T 信息: smartctl -a /dev/sdc
文件路径 1 2 3 4 5 Backups - /var/lib/vz/dump ISOs - /var/lib/vz/template/iso Images - /var/lib/vz/images Templates - /var/lib/vz/template/cache
挂载 Img 文件 1 2 3 4 5 6 7 8 9 10 11 12 13 14 15 16 17 18 19 fdisk /var /lib/vz/template/iso/DS918 _7.1 .1 .img Command (m for help): pDisk /var /lib/vz/template/iso/DS918 _7.1 .1 .img : 160 MiB , 167772160 bytes, 327680 sectorsUnits : sectors of 1 * 512 = 512 bytesSector size (logical/physical): 512 bytes / 512 bytesI/O size (minimum/optimal): 512 bytes / 512 bytes Disklabel type : dosDisk identifier : 0x1ef471e9 Device Boot Start End Sectors Size Id Type /var /lib/vz/template/iso/DS918 _7.1 .1 .img1 2048 133119 131072 64M 83 Linux /var /lib/vz/template/iso/DS918 _7.1 .1 .img2 133120 319487 186368 91M 83 Linux /var /lib/vz/template/iso/DS918 _7.1 .1 .img3 319488 327679 8192 4M 83 Linux mount -o loop,offset=1048576 /var /lib/vz/template/iso/DS918 _7.1 .1 .img /mnt/img
PVE 硬件直通 打开 iommu & pci passthrough 直通硬件,主板支持 iommu
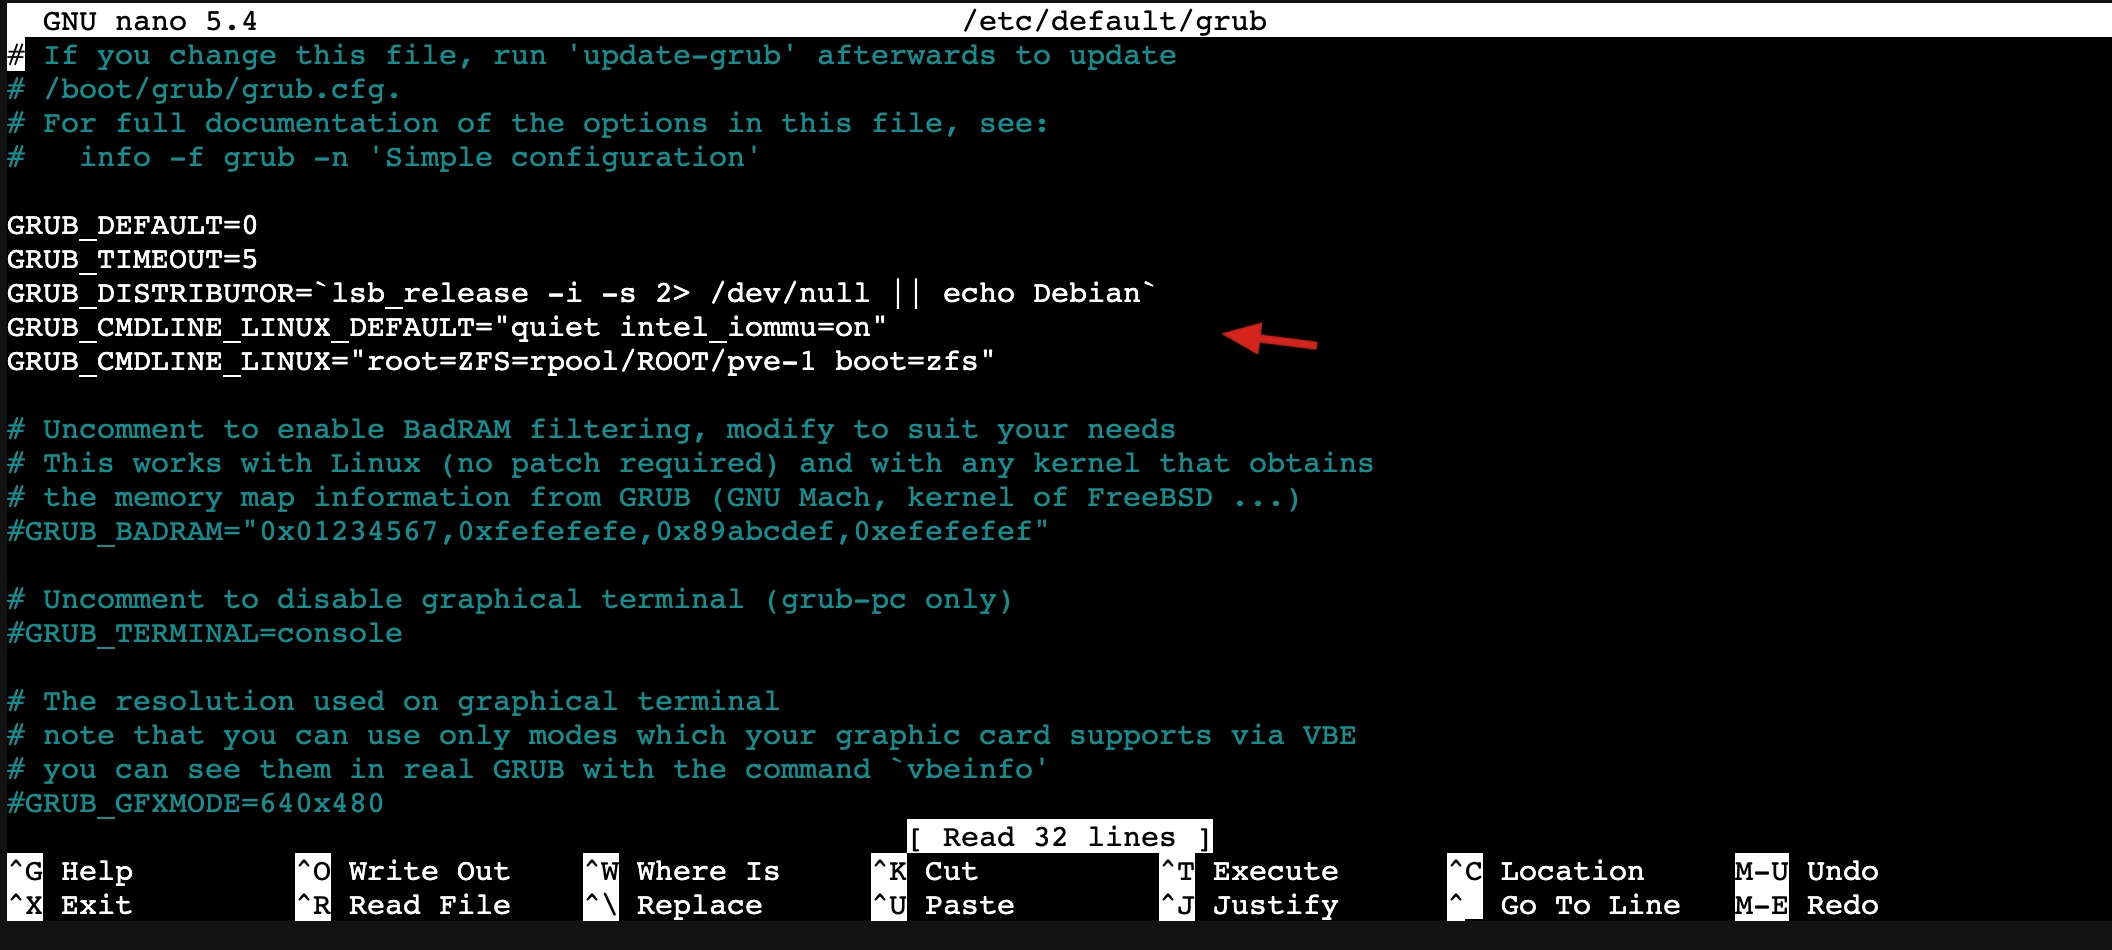
Inter cpu填写 intel_iommu=onupdate-grub 更新 grub
更新完后 reboot 系统。
其他参数:关闭核显,
硬盘直通 1 2 3 4 5 6 7 8 9 10 11 apt-get install lshw # 查看硬盘ID ls -l /dev/disk/by-id # 设置 qm set 103 --sata1 /dev/disk/by-id/ata-TOSHIBAXXX qm set 103 --sata2 /dev/disk/by-id/ata-ST1000LXXX # 无需借助任何软件直接转换openwrt的img文件为虚拟磁盘 qm importdisk 101 /var/lib/vz/template/iso/openwrt_esir.img local-lvm
GPU直通 设置 grub
1 2 // 修改此处 GRUB_CMDLINE_LINUX_DEFAULT="quiet intel_iommu=on pcie_acs_override=downstream,multifunction video=efifb:eek:ff"
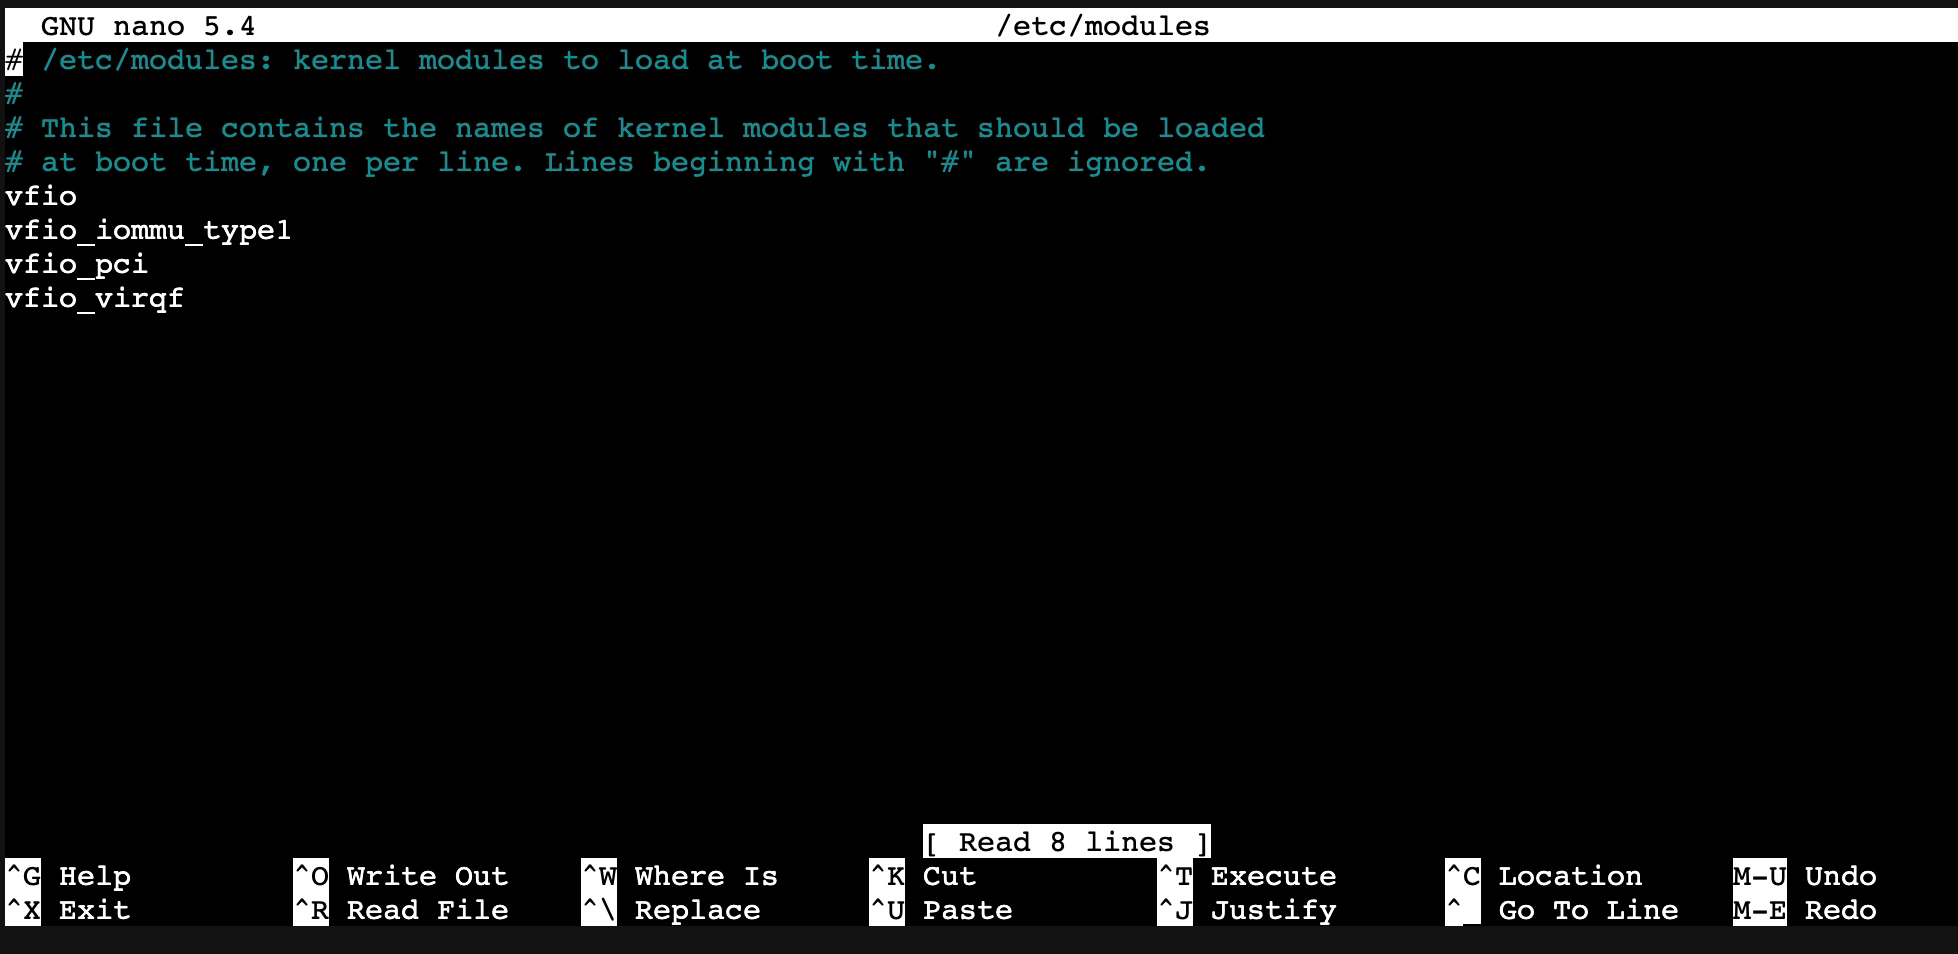
update-grubnano /etc/modules
1 2 3 4 vfio vfio_iommu_type1 vfio_pci vfio_virqfd
修改虚拟机配置文件 修改cpu
1 2 3 4 5 6 7 8 9 10 11 12 13 14 15 16 17 18 19 20 21 22 23 agent: 1 balloon: 4096 bios: ovmf boot: cdn bootdisk: virtio0 cores: 8 cpu: host,hidden=1,flags=+pcid efidisk0: fast1:vm-100-disk-1,size=128K hostpci0: 02:00,pcie=1,x-vga=1 hostpci1: 04:00.0,rombar=0 ide0: none,media=cdrom machine: q35 memory: 14336 name: beam numa: 0 ostype: win10 scsihw: virtio-scsi-pci smbios1: uuid=d6febb0d-4242-4bdb-8aea-7c03e7b5df0e sockets: 1 unused0: storage1:vm-100-disk-0 unused1: slow1:vm-100-disk-0 virtio0: fast1:vm-100-disk-0,size=80G vmgenid: 524a58dd-7e3e-44f4-abf4-9de0f490d936
屏蔽掉系统驱动
1 2 3 4 blacklist nvidiafb blacklist nvidia blacklist radeon blacklist nouveau
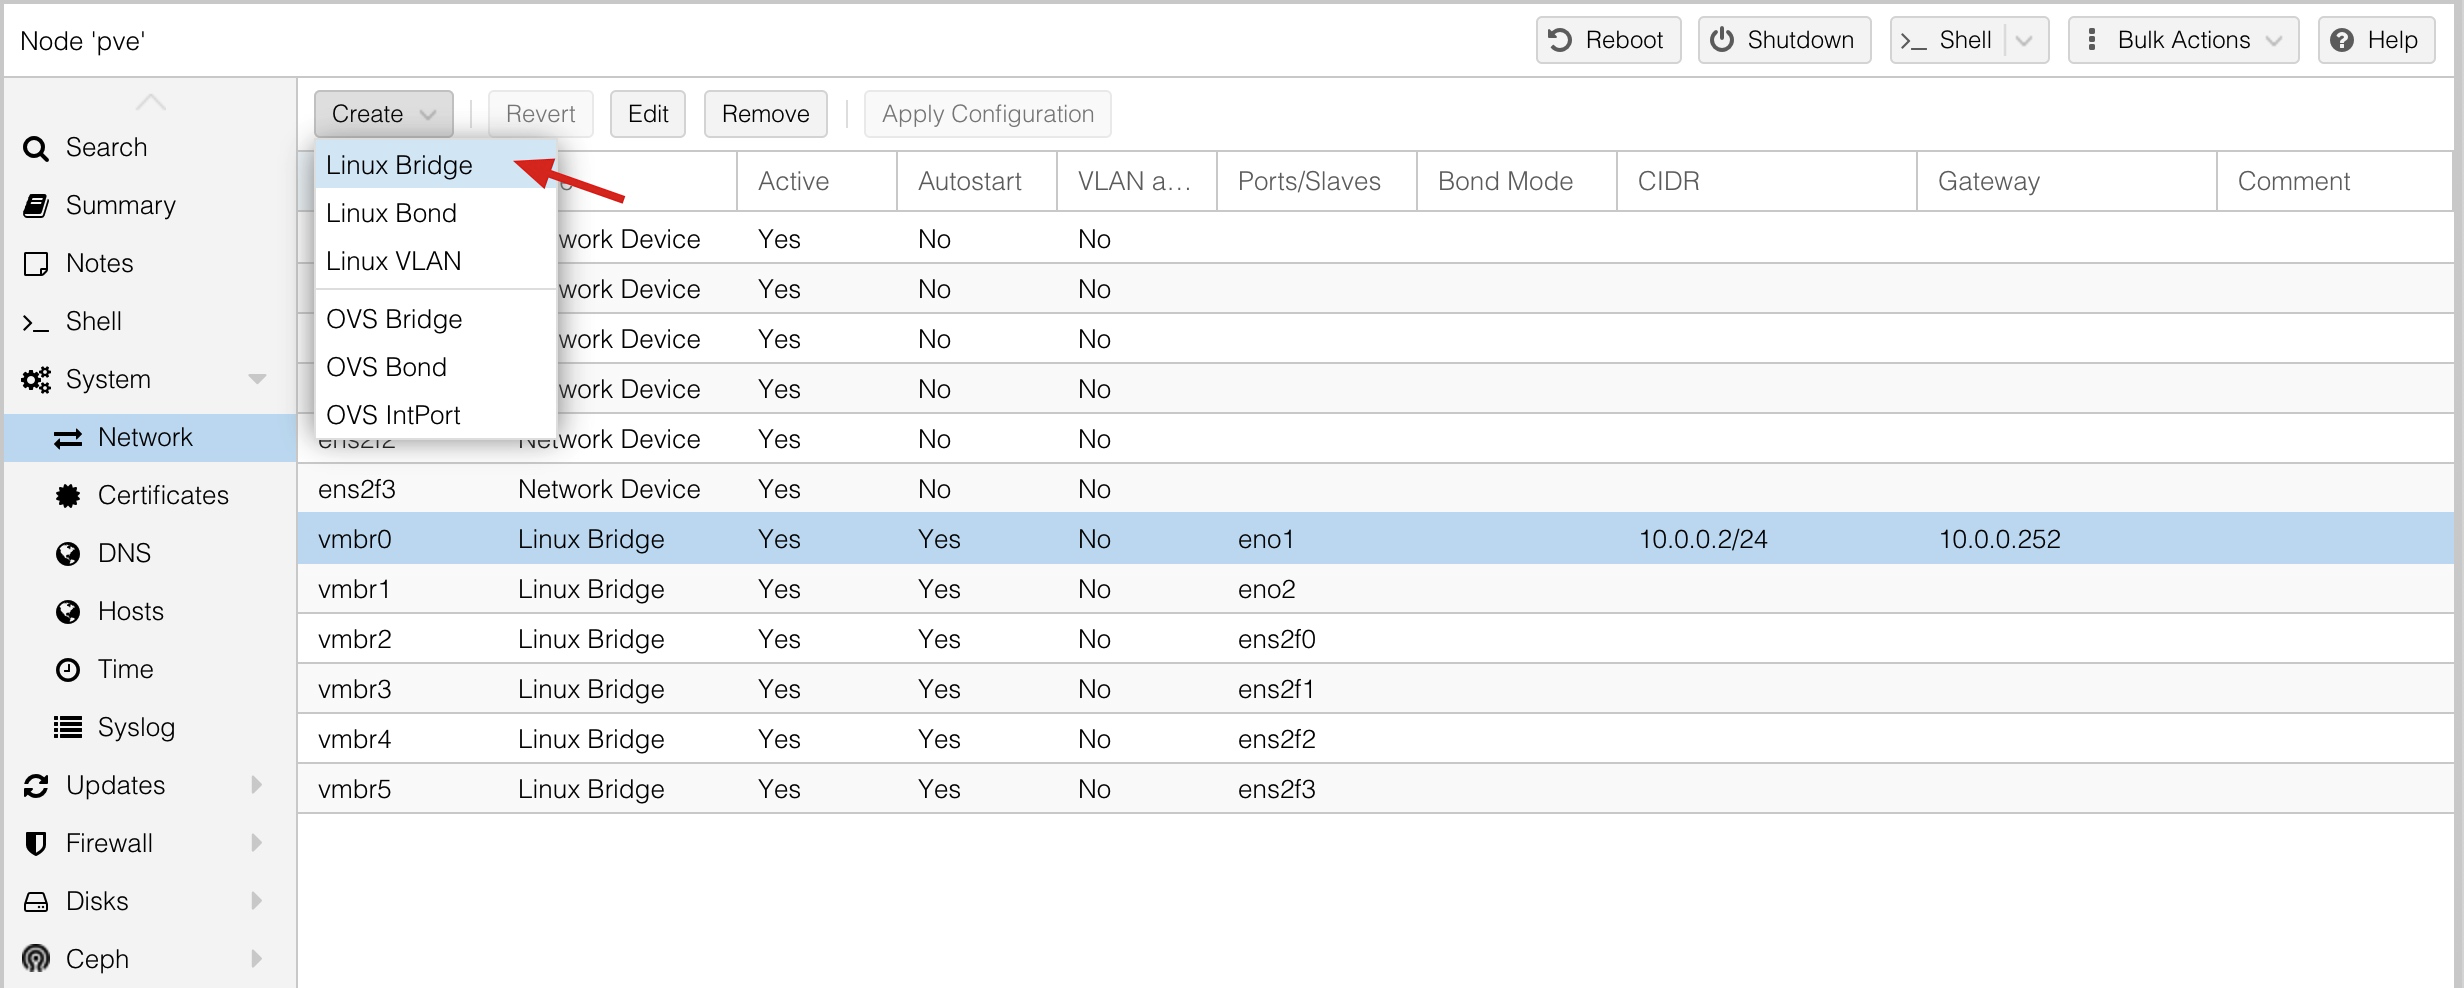
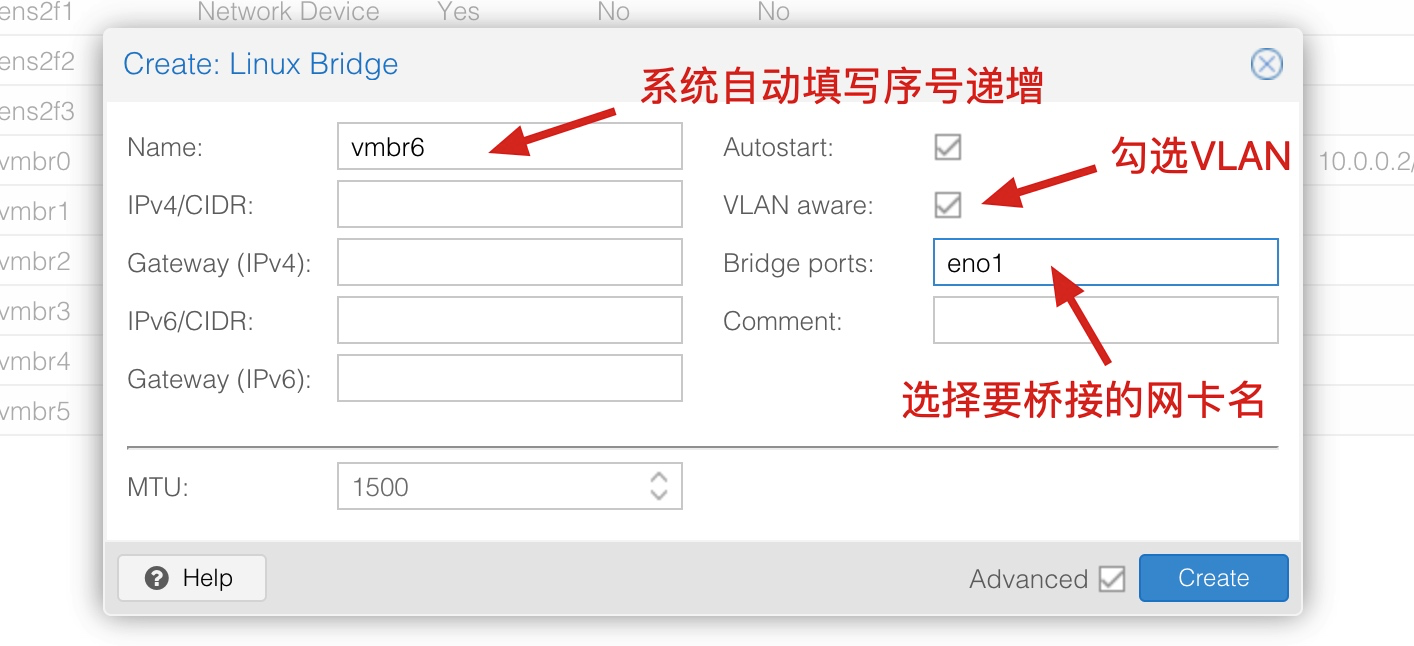
PVE 网络操作 添加 VLan 桥接网口
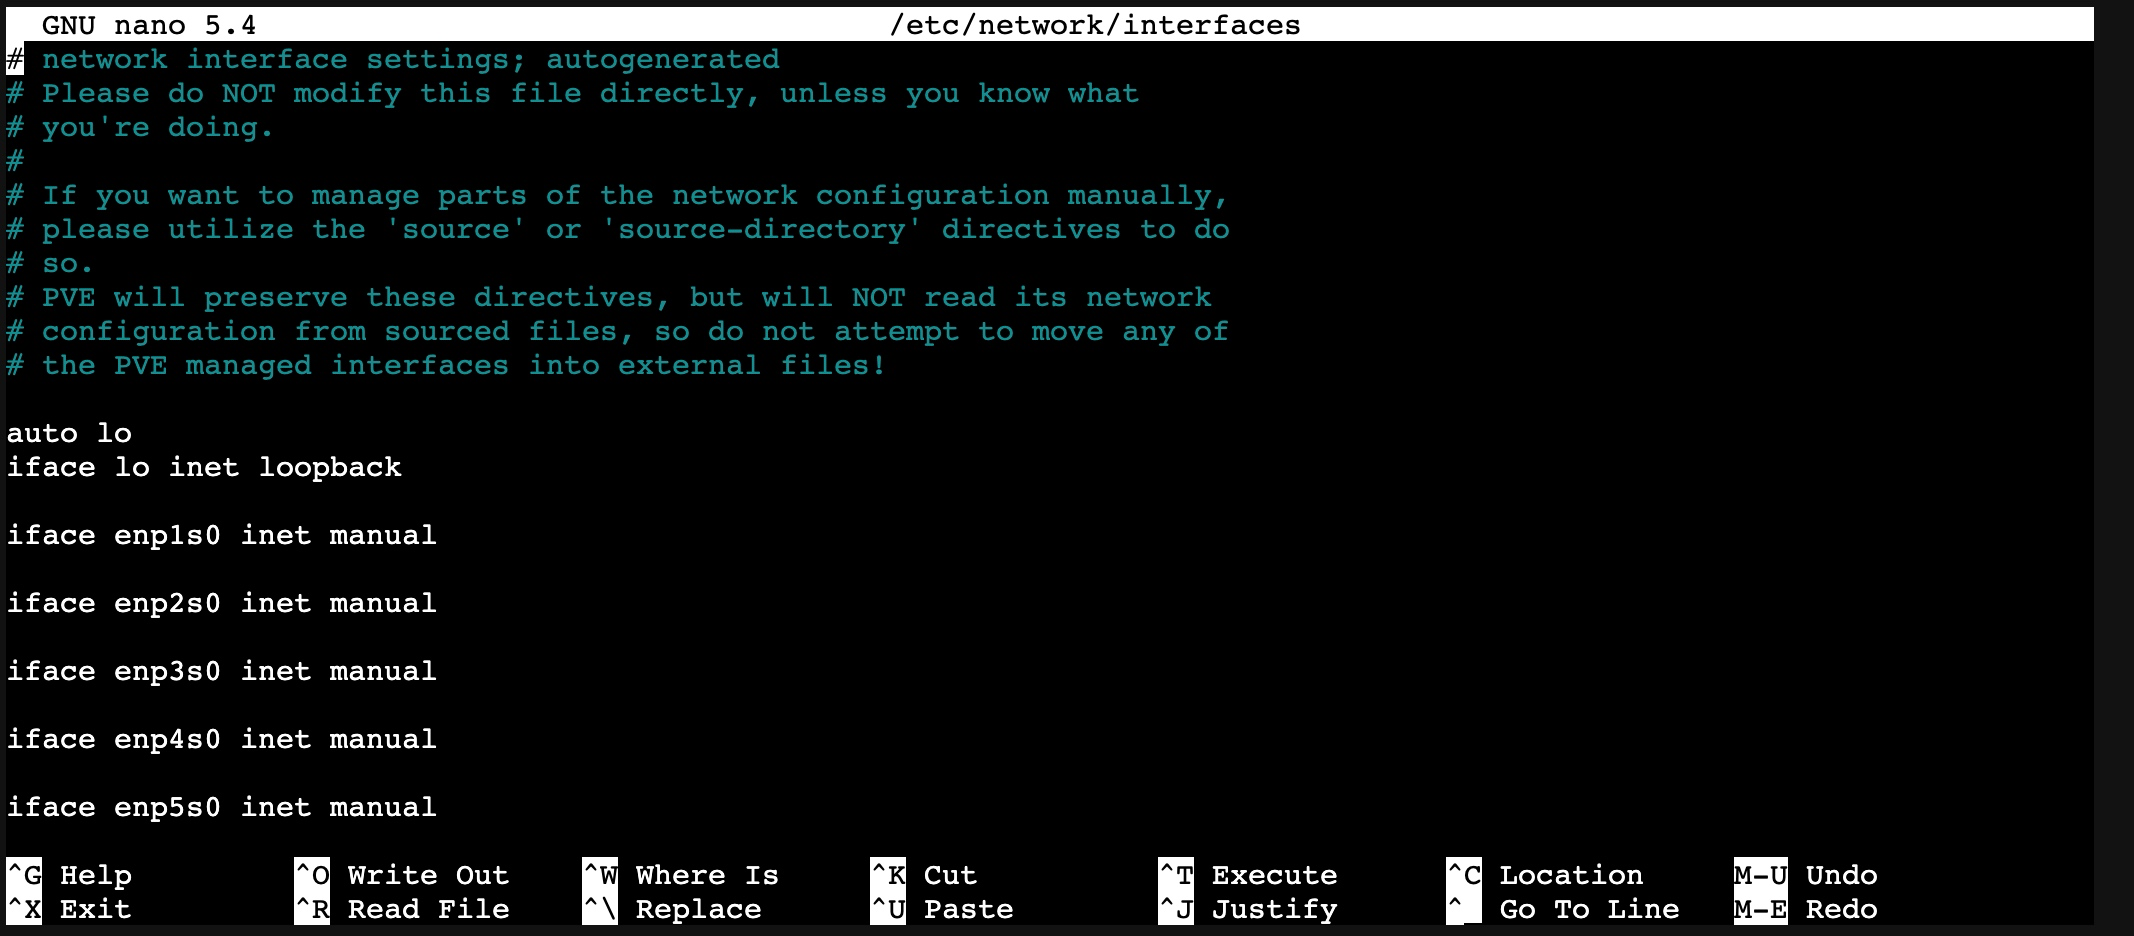
查看网络端口信息
1 nano /etc/network/interfaces
网络配置 网络测速 1 2 3 4 5 6 7 8 9 sudo apt install speedtest-clispeedtest apt-get install npm npm install --global fast-cli fast fast -u
配置网关 1 2 3 4 # Edit nano /etc/network/interfaces # 重启网络 /etc/init.d /networking restart
配置 IPV6 按下面的操作修改配置文件后即可正常获取 IPv6。
修改配置文件 nano /etc/sysctl.conf
把文件内容替换为 / 在末尾加上下面的内容
1 2 3 4 5 6 net.ipv6.conf.all.accept_ra=2 net.ipv6.conf.default.accept_ra=2 net.ipv6.conf.vmbr0.accept_ra=2 net.ipv6.conf.all.autoconf=2 net.ipv6.conf.default.autoconf=2 net.ipv6.conf.vmbr0.autoconf=2
另外备注一下:LXC 容器 获取 IPv6 地址要设置成 SLAAC 才能获取地址 (设置为 SLAAC 后既可以 DHCPv6 有状态,也可以 SLAAC 无状态,设置为 DHCP 只能拿到 Link-Local 链路地址)
1 2 3 4 5 6 7 8 9 10 11 12 13 # ifconfig eth0: flags=4163<UP,BROADCAST,RUNNING,MULTICAST> mtu 1500 inet 10.20.6.9 netmask 255.224.0.0 broadcast 10.31.255.255 inet6 2408:8210::18a9:1eff:fee2:600c prefixlen 64 scopeid 0x0<global> inet6 2408:8210::10:20:6:9 prefixlen 128 scopeid 0x0<global> inet6 fe80::18a9:1eff:fee2:600c prefixlen 64 scopeid 0x20<link> ether 1a:a9:1e:e2:60:0c txqueuelen 1000 (Ethernet) RX packets 134 bytes 33534 (33.5 KB) RX errors 0 dropped 0 overruns 0 frame 0 TX packets 126 bytes 24570 (24.5 KB) TX errors 0 dropped 0 overruns 0 carrier 0 collisions 0
可以看到同时通过 DHCPv6 和 SLAAC 拿到了地址
其他资料 https://github.com/xiangfeidexiaohuo/ProxmoxVE-7.0-DIY https://bbs.x86pi.cn/thread?topicId=20&page=351 https://www.cloudstaymoon.com/2024/04/10/all-in-one-1 https://www.vumstar.com/3897/ https://github.com/strongtz/i915-sriov-dkms


